Установка твиков мазда сх 5
Данная запись подготовлена на базе следующих источников:
Преамбула
Mazda Motor Corporation активно следит за тем, как многие умельцы находят бреши в защите выпускаемых её продуктов, а именно в ГУ на базе Mazda Connect I. Поэтому новые версии прошивок (70.00.335 и 70.00.352) имеют защиту от установки скриптов автозапуска через последовательный порт. Фактически, после установки данной прошивки последовательный порт (serial port) больше не воспринимает команды вводимые в окно терминала. Как следствие, метод описанный тут больше не работает.
Как установить авторан на ГУ с прошивкой 70.00.335 / 352?
Инструмент для разбора панели:
1. Набор пластиковых съемников/тулов: ali.onl/Zlq
2. Крестовая отвертка
3. Головка на 10 с переходником.
Порядок разбора панели для доступа к ГУ на пример Mazda CX-5 KF можно найти тут.
Подготовка флешки:
1. Отформатируйте USB флешку под FAT32
2. Записать на флешку прошивку 70.00.335 или 70.00.352 (в зависимости от того какую планируете установить на ГУ)
3. Распакуйте содержимое архива XX.zip в корень USB флешки. Должна появится папка XX со следующим содержимым.

Содержимое папки XX
Описание процесса установки:
1. Подключаем USB-TTL переходник к ГУ как показано на картинке ниже.
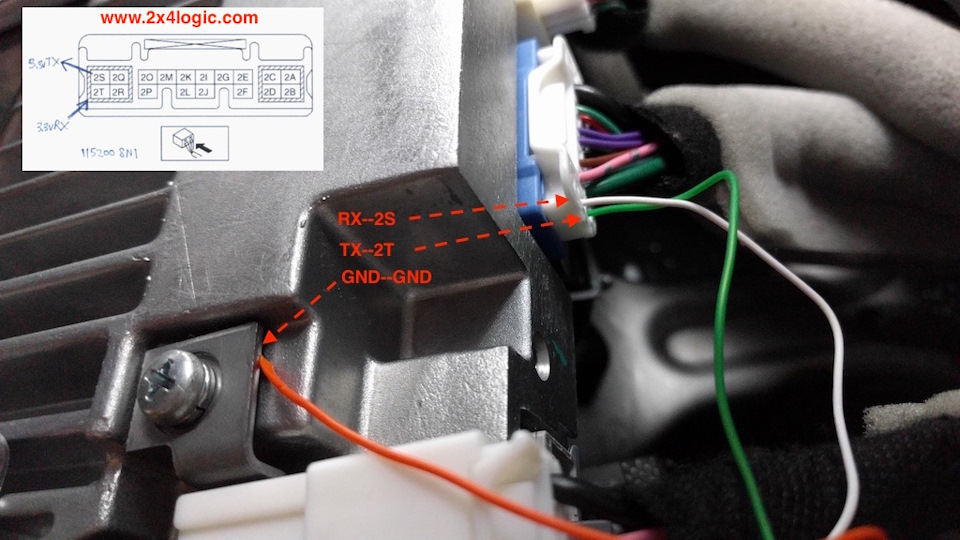
Подключение USB-TTL переходника к ГУ
2. Запускаем ACC однократным нажатием на кнопку Start (горит оранжевый индикатор)
3. Запускаем Putty и выбираем следующее настройки подключения

Настройки Putty
4. Нажимаем кнопку OPEN
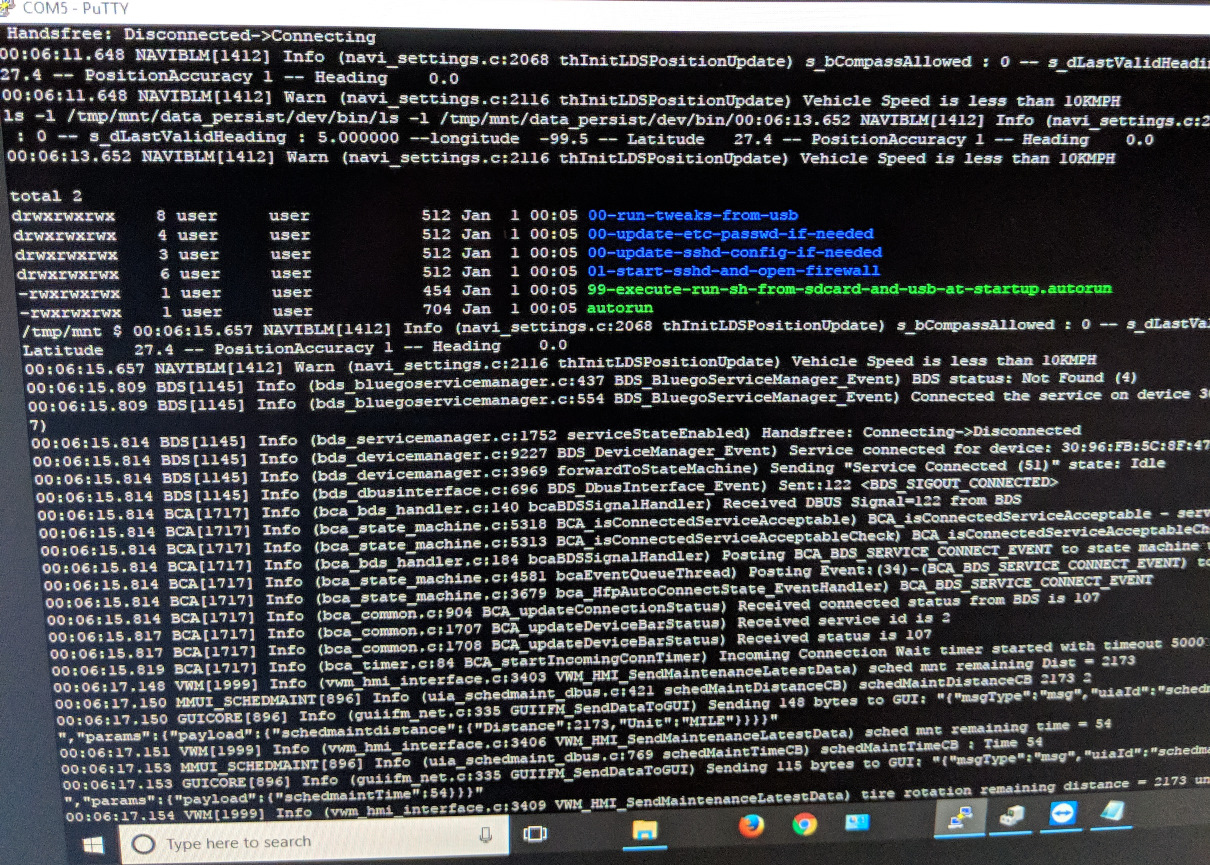
5. На черном экране Putty начинает бесконечно идти системная информация — значит подключение выполнено верно. Если видите пустой черный экран, значит неправильно подключили провода Tx и Rx, или есть проблемы с адаптером (драйверами).
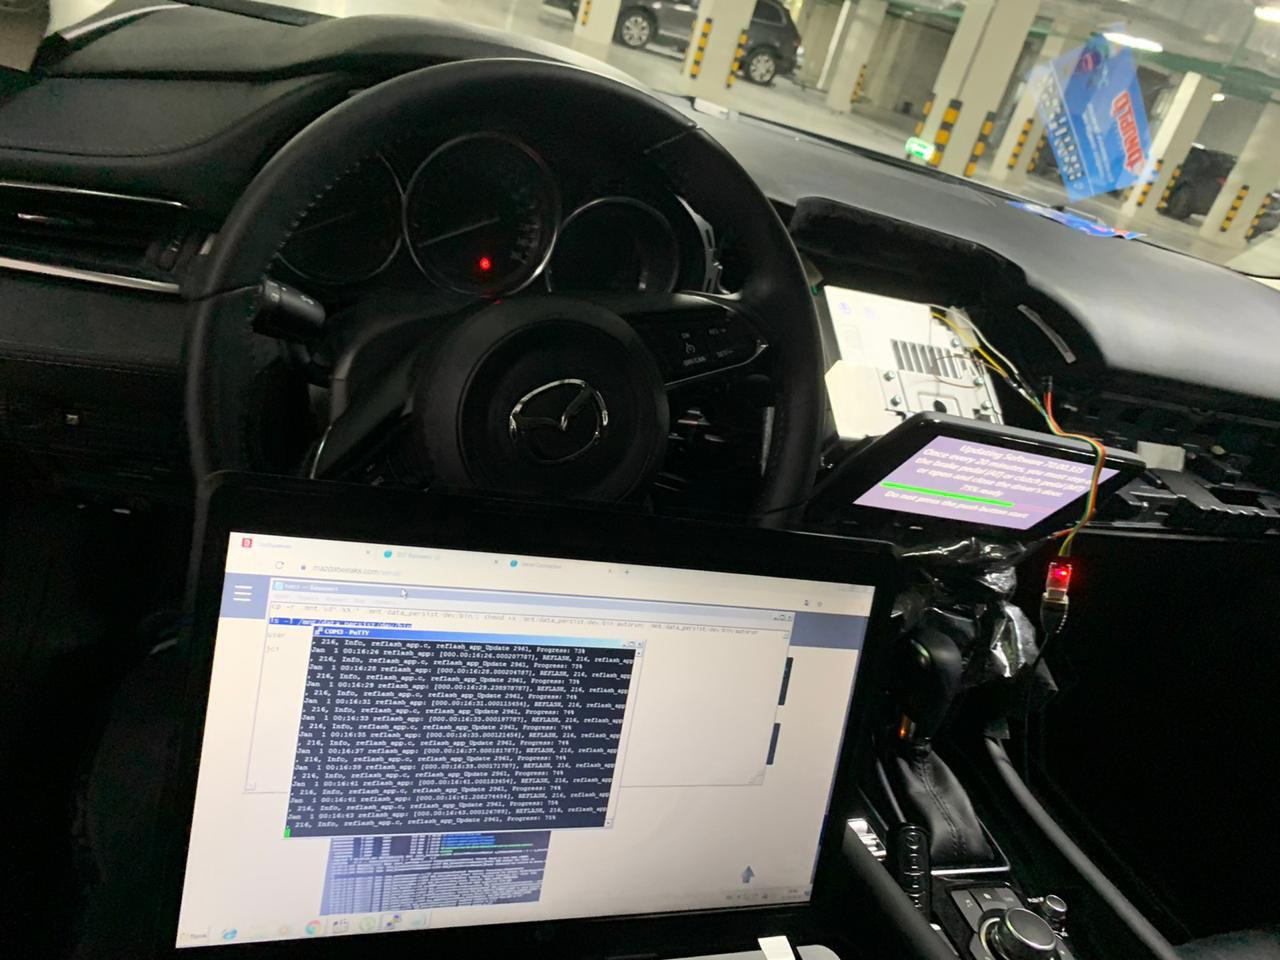
Лог при подключении через Putty
6. Подключаем ранее подготовленную флешку в USB слот автомобиля (как правило, он находится в подлокотнике) и обновляем прошивку ГУ. Инструкция по обновлению тут.
8. В Putty прописываем команду:
cp -r /mnt/sd*/XX/* /mnt/data_persist/dev/bin/; chmod +x /mnt/data_persist/dev/bin/autorun; /mnt/data_persist/dev/bin/autorun
Лучше ее заранее вставить в блокнот.
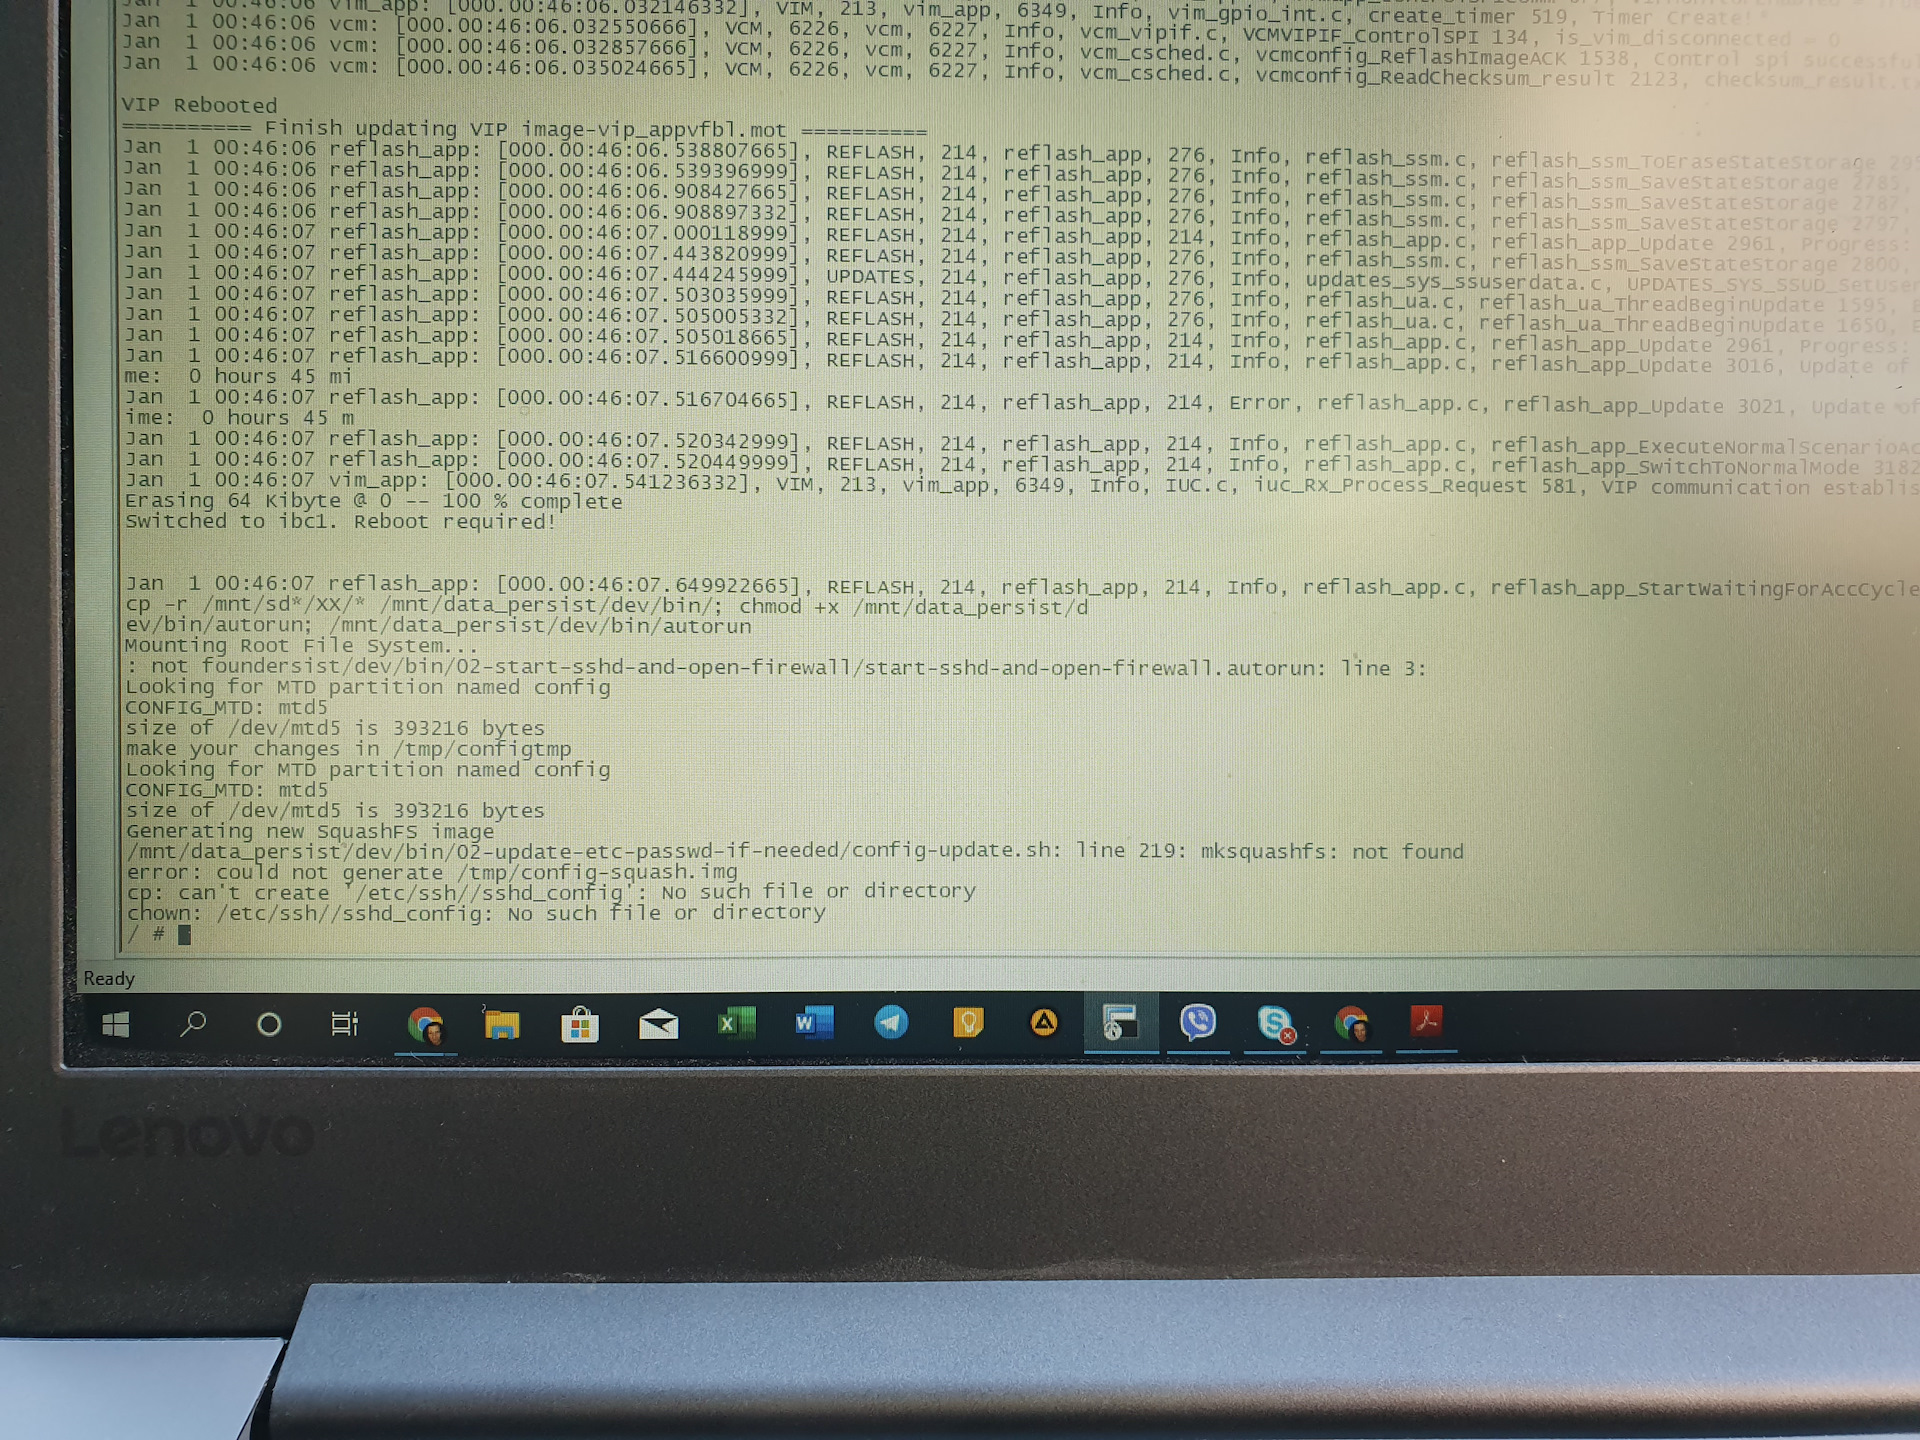
9. Для проверки, что скрипты автозапуска были скопированы, выполняем следующую команду:
ls -l /mnt/data_persist/dev/bin
Если появляются синие и зеленые надписи, значит процедура прошла успешно.
10. После этого ждем около минуты и выключаем/включаем кнопку Start.
Все же, путаясь в сомнениях, решил во всем разобраться и установить улучшения для Головного Устройства (далее ГУ), а именно — Видеоплеер, Спидометр и немного кастомный внешний вид!
Действовал исходя из инструкции:
1. Находим флешку (нашлась на 2Гб. форматируем ее в FAT32, размер кластера ставим по умолчанию)
2. Скачиваем с сайта MZD-AIO-TI v2.8.0
устанавливаем на ПК, и…

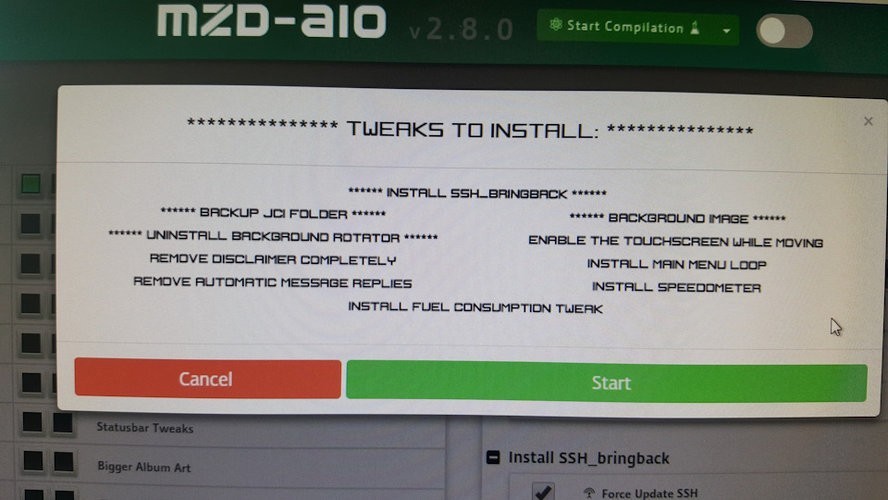
выбираем то, что хотим изменить или заменить…
3. После выбора должно получиться примерно так:

Наслаждаемся!
Стоит ли все это потраченного времени?! — однозначно стоит!
Фоновое изображение можно поставить абсолютно любое, я качал из сети, уменьшал разрешение и кадрировал до 800*480
Иконки так же можно кастомизировать как угодно!
Фоновые изображения и ярлыки я устанавливал друг на друга и переустанавливал несколько раз, нет ничего страшного, если накладываются друг на друга.
по поводу других Твиков не знаю, говорят, что лучше удалить старый и установить новый.
новые твики, которые просто забыл установить или хочешь добавить — устанавливаются без проблем
Кто хочет установить кастомные ярлыки, то возможно задастся вопросом, как выглядят те или иные иконки в пакете программы, то…
MZD-AIO-TI | MZD All In One Tweaks Installer
All-in-one installer/uninstaller for many available Mazda MZD Infotainment System tweaks.
32bit Windows Mac OSX: AIO v2.8.6 OSX Linux: AIO v2.8.6 Linux (deb)
MZD All In One tweaks Installer
Installer for many different system tweaks for Mazda MZD Infotainment System
Mazda 2 (DJ), Mazda 3 (BM), Mazda 6 (GJ), Mazda CX-3 (DK), Mazda CX-5 (KE), Mazda MX-5 Roadster (ND) and Mazda CX-9 (TC)
WHICH FW VERSIONS ARE SUPPORTED?:
ALL FW V55, V56, V58, V59 & V70 ARE SUPPORTED
- To install tweaks on:
- v59.00.502+ Requires making a serial connection
- v70.00.335+ Requires a slightly different approach
Information on Android Auto Headunit
Information on CASDK
IMPORTANT: All changes happen at your own risk!
Please understand that you can damage or brick your infotainment system running these tweaks!
Anyone who is unsure should leave it alone, ask someone with experience to help or ask in the forum.
I am not responsible for damages that may incur from the use.
Only use with Firmware >= v55. DO NOT USE with V30/31/33 OR THE SYSTEM WILL BOOTLOOP AT MAZDA BOOT LOGO.
App Size ~ 280MB
AIO Rebuilt with Electron & AngularJS
Included Translator & Photo-Joiner (for background rotator tweak)Special thanks to all the developers out there that made this possible!
And of course, Thanks to @Siutsch for AIO 1.x
Touchscreen
Allows the use of the touchscreen while driving.
Fix Cluster Compass: Some things will be disabled while driving but the touchscreen itself and the cluster compass will workNo More Disclaimer
Completely remove the disclaimer.
Reverse Camera Safety Warning
No warning across the bottom of the screen in reverse.
Semi-Transparent Parking Sensor Graphics.
Semitransparent parking sensor graphics for proximity sensors. When activating the rear camera, the car is displayed at the top right corner. The graphics now appear semitransparent by installing tweak.
Main Menu Loop.
Loop for the main menu.
You can jump from left to far right, and vice versa.Improved List Loop.
Loop for all lists and submenu (music, contacts, etc.).
You can now jump from the top position of a list to the bottom and vice versa.Shorter Delay Mod.
Reduces the waiting time for switching between pages with the multi commander from 1.5 to 0.3 seconds.
No More Beeps
Disable all ‘Beeps’ made by the system that are not silenced by the ‘Settings > Sound > Beep’ option. This also includes the beeps that cannot be silenced by the settings option.
Change Order of the Audio Source List.
Customize The order of the audio sources list.
Pause On Mute.
When pressing mute (pressing the volume button) played media are also paused. Only works in the music player screen.
Remove Message Replies
Removes the text ‘Sent from my Mazda Quick Text System’ if answering messages.
1 Sec Diag Menu
Allows you to open the diagnostic menu by touching the clock at the top right of the display settings menu for one second.
Boot Animation
Customize the boot animation.
Date In Status Bar Mod.
Permanently visible date + icons above the clock, even if system messages are displayed. Choose between 3 date formats.
USB Audio Mod. By: Enlsen
(NOT Compatible with FW v59.00.502+)
** Patches The USB Audio App With These Mods:
- Long press (click hold) folders/all songs to play
- Adds new icon for USB root menu on the UMP control
- Removes “More like this” button from UMP control
- Adds folders button to UMP control
- Set folders and song list icons correctly (were switched) on UMP control
- Removes trailing “/” character from folder names for list control and title of now playing
- Adds folder and song icons to the list control
- Adds folder and playlist icons to now playing
- At the begining or each track shows Artist - Title in a status-bar notification.
Bigger Album Art
You get a bigger album art graphic. Extra Options:
- Full Width Titles: Song/Album/Artist will span across the entire screen.
- Hide Album Art: Hides all album art.
No Background Behind Buttons
Remove the background behind the buttons and other semi-transparent overlay backgrounds. Overlays that can be removed: Now Playing, List View, In Call, Text Message View, and Behind Buttons
Change Blank Album Art Frame
Swapfile
The Swapfile will provide your system with an additional 1 GB of RAM running from the USB drive for playing videos. The installation of the swap file must be done on a USB drive with music and/or movies, that remains in the car. The installation files are automatically deleted, the drive may no longer be removed during operation, because the system will use it also as memory. Only remove the USB drive if the MZD system is off.
Fuel Consumption Tweak.
Additional display of KM/100L, L/KM, or MPG.
Videoplayer
Speedometer
Speedometer App with many options and features.
Castscreen receiver.
After installation you can mirror the smartphone screen at the infotainment display (mirroring).
- You have to install the castscreen app on your Android Phone (castscreen-1.0.apk) The app can be found in the ‘config’ folder of your USB drive
- activate the debug mode on your smartphone
- connect the smartphone with USB cable to the infotainment system
- start the app settings: H264, 800x480 @ 160, 1 mbps, then input 127.0.0.1 and press input receiver, then tap Start on right-up corner.
Android Auto Headunit App.
- Install the Android app from google play store
- Connect the phone to USB and pair the phone bluetooth with the CMU
- Android Auto will then start. If it does not try to open from the ‘Applications’ menu
- 3 ways to stop AA
- Hold Call End Button on the stearing wheel or Back Button on the Mazda’s Commander for 3 seconds
- Disconnect the USB cable
- Use the onscreen menu ‘Return to Mazda Connect’ on last screen with speedo icon.
AIO Tweaks App.
AIO Tweaks App is an experimental app by Trezdog44 made to test the capabilities, functionalities, and limitations of apps in the MZD Infotainment System.
This app has some useful and fun functions although it is not guaranteed that everything works. There may be non-functioning or experimental features.
CHANGELOG
NEW FEATURES
- Android Auto Wifi Suport
- VideoPlayer v3.5
- Speedometer v5.7
- AIO Tweaks App v0.7
- Android Auto Headunit 1.07 + AA Info & Updates
- VideoPlayer v3.1 w/ Options/Info Panel
- AIO Tweaks App v0.4
- Speedometer v4.8
- Autorun scripts for testing and recovery
- ID7_Recovery Pack for recovering access to the CMU
- AIO Tweaks App
- Speedometer upgrades
- Extended compatibility to all v55, v56, v58 and v59 FW versions
- USB Audio Mod
- Full width titles
- Hide Album Art
- Hide Background Overlays
- Video Player v2.9 w/ localStorage Saving
- Custom Boot Animations
- New ScreenCast App for Android 7.0
- Improved ScreenCasting Functionality
- Force Update SSH option
- Zip backup option (takes a long time)
- Choice of Android Auto Version to install (v0.99 or v1.02)
- Video Player v2.8 rollback version in downloads menu for those with Unicode character issues.
- Video Player v2.8 w/ Multicontroller functionality
- New themes
- Smooth Azure
- Smooth Violet
- Video Player v2.7
- Android Auto v1.02
- Remove List Beep
- Skip Confirmation Option
- 6 New Themes
- Custom Theme Support
- User Interface Style Tweaks (UI Style)
- Set Music Song Title Color
- Set Music Artist Color
- Set Other Text Colors
- Text Shadows
- Date2Statusbar v3.3
- Main Menu Tweaks
- Layouts
- 3d Main Menu label
- Small Coins
- Remove Ellipse
- Touchscreen Tweak Compass Fix
- Options For Background Rotator Tweak
- Set how many images to rotate through.
- Set amount of time for each image to show.
- Backup Options
- Statusbar Tweaks
- Set App Name Color
- Set Clock Color
- Set Navigation Notifications Color
- Remove Statusbar Image
- Set Statusbar Opacity (0 - 1: 0 - Transparent / 1 - Black)
- Off Screen Background
- Set a background image for “Turn Display Off and Show Clock” in the Settings Menu.
- Will also display on system shutdown.
New Features in 2.0:
- Completely Rebuilt Desktop App GUI.
- Ability to install and uninstall tweaks in the same installation (Be careful this is a Beta feature).
- Tweak files for ‘Color Scheme’ (105MB) and ‘Speedcam Patch’ (207MB) are downloadable extras to keep the app size small.
- Choose an image to replace your infotainment background, automatically resized to 480x800px to fit the screen.
- Replace blank album art with any image, automatically resized to 146x146px.
- Image-Joiner for joining multiple images for the ‘Background Rotator’ tweak. Each Image is resized to 480x800px.
- Also, a choice to upload an image that will not get resized for background rotator.
- Separated the ‘Improved List Loop’ and ‘Shorter Delay Mod’ into individual tweaks.
- Choice for ‘Enable Wifi’ and ‘CID to SD’ tweaks (enabled by default).
- Choice to use color scheme background or not.
- More information and backups are collected during tweak installation (For planned ‘Save Backups to PC’ and ‘System Analysis’ tweaks).
- Copy Files to USB Drive (works for a single plugged in drive or choose 1 out of a list of all available external drives)
- Save/Load tweak options.
- All 40+ tweaks from AIO 1.x with variations.
- Automatic Updates.
- Updated to most current version of Android Auto.
- More to come!
- Image formats supported: .jpg .jpg .jpg .bmp .tiff
- Images are converted to .jpg format
- Built in Translator
What is ‘MZD-AIO-TI’?
My good friend Siutsch copied files from many different tweaks for his infotainment system and thought, it would be helpful if you could choose what tweaks you wanted to install or uninstall. He went on to develop a CMD based program to accomplish this and it worked well but lacked that modern app feel and faced other limitations. As a developer, I felt like I should upgrade AIO into a full fledged desktop app but with the same underlying tweaks that we all know from AIO v1.5.x. It was around that time I came across Electron and I went on to develop MZD-AIO-TI.
This Project has 2 particular aspects, user interface and the custom built installer script: tweaks.sh and associated files. @Siutsch and I continue to work together on that aspect to this project to optimize the tweaks.sh script for safety, efficiency, and in the future analysis.
How to install:
Download and open the setup file and it will install and start up.
- Select Desired Tweaks and Press the “Start Compilation” Button.
- Insert a blank FAT32 USB flash drive to copy files directly to the drive
- Or copy the contents of “copy to usb” (created on your desktop) to the root of a blank USB flash drive.
Before Car Installation:
- Start with the vehicle off
- Unplug any other USB drives from the car except this flash drive.
- For installation of speedcam patch (see below), the NAVI SD card must remain in the car, because speedcam.txt file will be copied directly to SD card.
- For installation of speedometer, the NAVI SD card must remain in the car too, without NAVI SD card a special patch will be installed, otherwise the compass is rotated 180 degrees.
- In general, the SD card can remain in the car during the tweak installations.
Installation Into MZD Infotainment System:
- Plugin USB drive, turn on car and wait for the “== MZD-AIO-TI ==” window to appear (This may take 2 - 20 minutes so be patient).
- At that point you will be given the option to continue or abort the installation.
- Associated messages with pop up during installation (No further user interaction is needed).
- The system will be restarted automatically.
- Remove the USB drive after restart.
- Tweaks will be applied upon reboot.
Compatibility will be generally checked at the beginning of an installation, if your FW is not compatible the installation will abort at this point. This is for the safety of incompatible systems.
The following tweaks are checked individually during installation of tweaks.sh, because there are different (config)-files to consider:
- No More Disclaimer
- Order of Audio Source List
- List Loop
Date To Statusbar Mod
For More information visit the FAQ Page
TOOLS:
Electron is an amazing shell developed by Github utilizing the awesome power of both the NodeJS and Chromium APIs into a single runtime harnessing web based programming languages into beautifully packaged desktop apps.
AngularJS Javascript app framework by Google
Tweaks Master Bundle (v55)
by miket0429
- now with additional picture of a radio, if there is no entry in the gracenote database or no album art is found in mp3 tag.
Speedometer_v4.4
by_Diginix
Based on mod by Trookam (which is based on mod by anderml1955 I think), first version of speedometer by serezhka, mph changes first done by windwalker
Video player v2
by Waisky2 with mods by vic_bam85
Use H264 video codec and MPEG-4 AAC audio codec
You have to place your videos in a folder “Movies”!Так сложилось, что владельцы автомобилей Mazda начиная с 2017 года остались обделенными в плане установки сторонних приложений/твиков на Головное Устройство (ГУ). А причина всему новая прошивка ГУ. Начиная с 59.00.502 по 70.00.xxx (59.00.502/504/532/545 и 70.00.21/100/335/352) заблокирована возможность запуска скриптов с USB-флешки. Точнее сказать, ранее изученные методы, увы, не работают на ГУ с прошивкой 59.00.5хх или 70.00.xxx.
Что же делать?
Разумеется, прогресс не стоит на месте, и обходной путь был найден. Сразу оговорюсь, что описанный ниже метод применим для прошивок начиная с 59.00.502 по 70.00.100.
Последний, отчет от Валеры, самый простой и удобный в использовании. И сегодня мне довелось проверить его в деле.
И так что нам потребуется для разблокировки ГУ?
Инструмент для разбора панели:
1. Набор пластиковых съемников/тулов: ali.onl/Zlq
2. Крестовая отвертка
3. Головка на 10 с переходником.Подготовка флешки:
1. Отформатируйте USB флешку под FAT32
2. Создайте папку с именем XX
3. Распакуйте содержимое архива autorun.v3.zip в папку XX
Если Вы хотите создать Wi-Fi точку доступа внутри автомобиля, то сконфигурируте файл XX/00-start-wifiAP/wifiAP.configfile. В противном случае удалите папку 00-start-wifiAP.Разбор панели и получение доступа к ГУ
Фотографии (для Mazda CX-5 KF):
Наклеили малярный скотч и вставили в щель съемник Отгибаем съемник в бок, накладка отщелкивается С небольшим усилием на себя отщелкиваем дальше накладку Отщелкнули полностью накладку. Кнопку запуска не отключаем. Аккуратно кладем накладку на ткань (или другой прокладочный материал) Отгибаем верхнюю накладку, она отщелкивается легко. По месту соприкосновения инструмента с панелью проклеили малярный скотч, чтобы не повредить панель Аккуратно ощелкиваем накладку с одного края Верхняя накладка частично отщелкнута Продолжаем аккуратно на себя вытаскивать накладку Отсоединяем разъем аварийки и убираем верхнюю накладку на заднее сидение/багажник Вот что в результате получаем. Нижняя накладка с кнопкой запуска завернута в ткань Откручиваем ГУ (крестовая отвертка и головка на 10 нам потребуется) Нижние винты уже откручены Откручиваем болты Вынимаем ГУ на себя. Оно также зафиксировано на защелках. Смело тянем на себя ГУ обратный вид В крайние пины разъема вставляем провода Готово. Провода вставлены в разъём Подключаем GND (синий провод) к корпусу ГУ Подключаем провода к адаптеру.
Первый раз мы перепутали Rx и Tx. Если при открытии Putty вы ничего не увидите (т.е. не будет передачи данных), то поменяйте провода Rx и Tx местами.
![]()
Подключение к UART готово
Далее вставляем ранее подготовленную флешку со скриптом автозапуска в USB порт в подлокотнике. SD-карта, другие USB-устройства должны быть отключены! Должна быть подключена только одна флешка со скриптом автозапуска!
На следующем шаге включаем зажигание (однократное нажатие на кнопку запуска, только для включения ГУ) подключаемся к ГУ через Putty или любой другой терминал. Если подключение правильное, то при открытии порта, Вы увидите кучу диагностической информации. Далее как и описано в инструкции логинимся. Вводим:user
jciПроще всего будет скопировать логин и пароль. И в окне терминала после нажатия кнопки Enter, вставить логин и пароль. Из-за не перестающего потока данных с ГУ, увидеть результат ввода будет сложно. Нужно будет прокрутить лог вверх и посмотреть, удалось ли залогиниться.
Как известно, автомобили Mazda, выпускаемые последние 7 лет, поставляется с головным устройством (ГУ) на базе системы Mazda Connect. Сейчас на смену первого поколения этой системы приходит второе, которое на данный момент устанавливается на автомобили Mazda 3 (BP) и Mazda CX-30 (DM). Но большая часть моделей по-прежнему поставляется с системой Mazda Connect I (первого поколения).
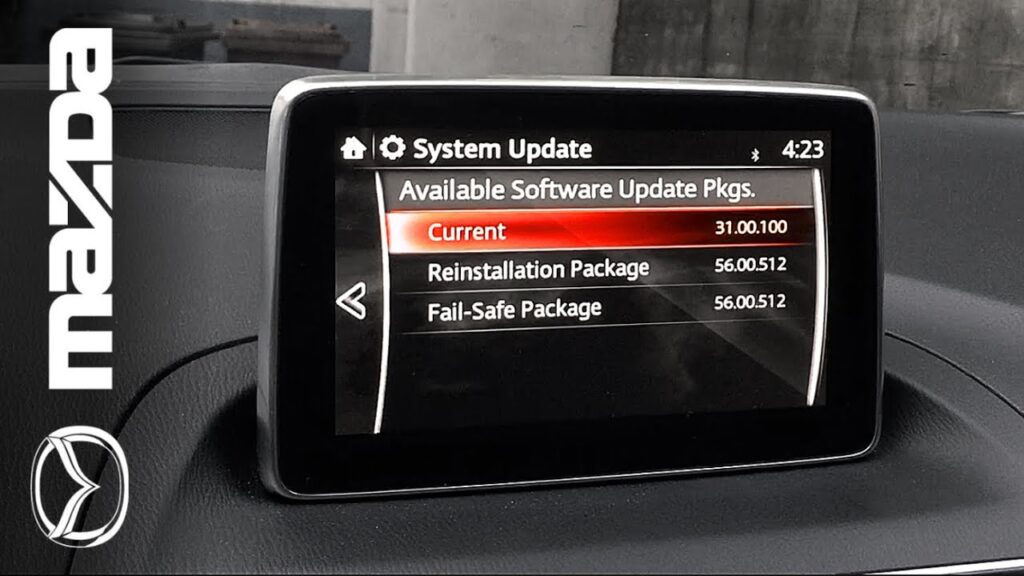
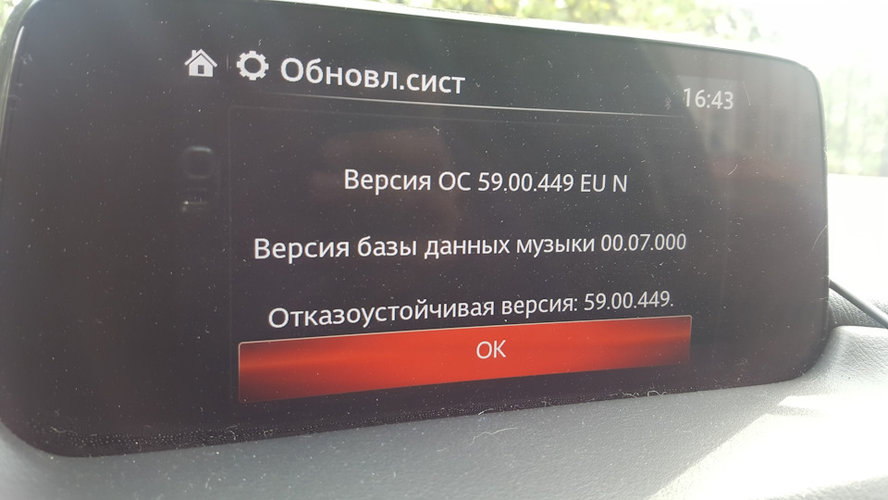
Mazda Connect I
![]()
Если смотреть ретроспективу обновлений данной системы, то оно пережило 3 значимых этапа:
- Переход с прошивки 3х.хх.ххх на 56.00.ххх, где изменилось разметка областей памяти fail-safe части ГУ
- Появление Android Auto и Car Play и переход на версию 70.хх.ххх
- Закрытие всех дыр для запуска скриптов и появление однофайловых прошивок 70.00.335 и выше.
Список базовых прошивок Mazda Connect I для Европы
cmu140_EU_30.00.100A
cmu140_EU_30.00.300A
cmu140_EU_31.00.100A
cmu140_EU_33.00.500A
cmu150_EU_56.00.100A
cmu150_EU_56.00.210A
cmu150_EU_56.00.230A
cmu150_EU_56.00.511A
cmu150_EU_56.00.512A
cmu150_EU_56.00.513B
cmu150_EU_59.00.443C
cmu150_EU_59.00.449A
cmu150_EU_59.00.502A
cmu150_EU_59.00.532A
cmu150_EU_59.00.545A cmu150_EU_70.00.000A
cmu150_EU_70.00.021A
cmu150_EU_70.00.335A
cmu150_EU_70.00.352B
cmu150_EU_70.00.367A![]()
Общий список прошивок Mazda Connect I на 2021 год
v. 70.00.021A
— Пауза при отключении звука в MZD Connect.v. 70.00.000A
— Добавлена поддержка Carplay / Andriod Autov. 59.00.546A
— Отключены настройки яркости монитора для камеры заднего вида.v. 59.00.545A
Исправления:
— Улучшения и исправления неисправностей зависят от текущей версии программного обеспечения (программного обеспечения), установленного на автомобиле.
— [Только версия 59.00.544, кроме 2017-2018 Mazda3 (производства Мексики)] При использовании функции — памяти для регулировки положения сиденья и отображения активного водителя, звуковой сигнал может не выводиться после завершения автоматической регулировки.
— Настройки дисплея для запросов системы навигации на дисплее активного водителя могут не сохраняться для функции сохранения настроек положения сиденья и дисплея активного водителя.v. 59.00.532A
— Добавлен украинский язык интерфейсаv. 59.00.504A
— Неизвестноv. 33
Исправления:
— Восстанавливает звуковое уведомление при превышении ограничения скорости на экране навигационной карты.
— Значок автомобиля на навигационной карте улучшена производительность и точность.
— Навигация отображает графические улучшения и исправления ошибок.
— Обложка альбома теперь отображается при подключении iPhone или iPod через USB.v. 31
— Улучшение производительности дисплея часов при получении приема GPS.
— Увеличена производительность и стабильность USB-устройства.
— Теперь подсказки навигации можно полностью отключить, повернув ручку регулировки громкости на ноль во время воспроизведения подсказки или в настройках навигации.v. 30
— Системная память для настроек, избранного, сопряженных устройств и истории улучшена, чтобы обеспечить сохранение.
— Улучшена производительность распознавания голоса для функций вызова на французском языке.v. 28
— Улучшенная графика и дизайн на экране Радио.
— Исправлены ошибки и улучшена производительность и работа коммандера(кнопки управления на консоли).
— Исправлены ошибки и улучшена производительность при переходе к адресу путем выбора адреса в контакте телефонной книги.Читайте также: